If you have a deck, one essential part of maintenance is learning how to stain it. Stain can be used to change your deck’s color or just accentuate the wood grain; it may also include sealant to protect the wood.
To keep your deck in good shape, aim to stain or seal it once a year, says architect Craig Martin of SPIRE Architecture in Annapolis, MD.
Luckily tackling this task is an easy weekend project. Here’s how to stain or seal a deck to keep it looking its best. Before you start, however, you should thoroughly clean the deck.
Related Articles
- A Guide to Decking Materials: Which Is Right for Your Home?
- The 7 Best Home Improvements You’ll Ever Make
- Deck Building Tips That Really Pay Off—and 1 That Doesn’t
Tools you’ll need to clean a deck:
- Broom
- Putty knife
- Hammer/drift pin
- Pressure washer
- Vinegar (apple cider or white distilled)
- Scrub brush
Step 1: Clear surface debris
The first step in cleaning a deck is to sweep off any surface gunk such as dirt, twigs, and leaves. This can be accomplished with an ordinary broom on the top, but be sure to pay special attention to the cracks. Use a putty knife or similar tool to dig out any leaves or other items lodged between boards in the crevices as these can rest on the joists and eventually rot the boards.
Step 2: Look for protruding nails
A worn deck that has been battered by the elements can have protruding nails caused by the boards repeatedly getting wet and then drying out. So, a good safety practice while cleaning your deck is to look for any nails that are sticking out and hammer them back down with a drift pin on the nailhead (to avoid damaging the wood itself) until they’re flush with the boards.
Step 3: Power-wash the boards
If you have access to a pressure washer, this is the time to pull it out, or consider renting one (especially if your deck is large). This is a highly efficient way to thoroughly clean a deck regardless of the material. However, if your deck is made of wood, keep the power wand moving at all times and keep the water stream 6 to 8 inches from the surface to avoid damaging the grain.

A quick way to clean a deck is to use a pressure washer with a high-powered water stream.
Step 4: Bring out the vinegar
Don’t have access to a pressure washer? You can do the cleaning by hand with some vinegar, water, and a scrub brush. Apple cider or distilled white vinegar is a recommended all-natural deck cleaner by many sources. Just pour vinegar on the deck and let it rest for an hour (preferably in the sunlight). Then vigorously attack the rust, mildew, or moldy areas with a scrub brush. Finally, rinse the deck with water.
Now it’s time to properly stain and seal the surface.
Tools you’ll need to stain or seal a deck:
- 80-grit sandpaper (electric sander is optional)
- Waterproofing deck stain (and sealer)
- Paintbrush
- Deck staining pad or paint foam roller
- Paint tray
Step 1: Smooth the edges
Though this step is optional, it’s a good idea to sand down any rough spots or splinters, especially handrails and high-traffic areas. This can be accomplished by “spot sanding” certain areas, or doing a once-over of the whole deck with an electric sander.
Step 2: Stain between the boards
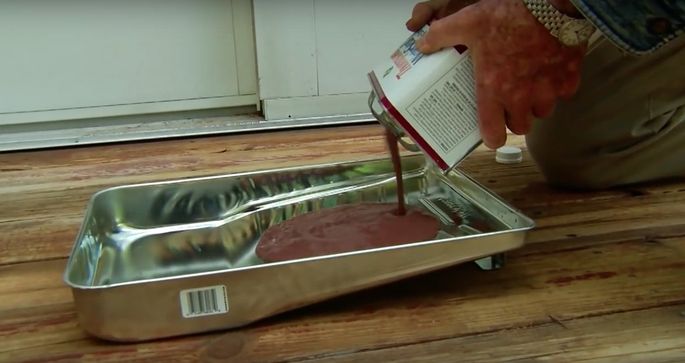
Pour whatever waterproof stain, sealer, or hybrid stain-stealer you’ve selected into a paint tray, and start to resurface your deck by using a paintbrush to coat the crevices between the boards. By doing this, you ensure that you don’t miss these areas and they are sufficiently covered before you treat the deck top.
Before painting anything, make sure that the stain or sealer you’ve chosen can be applied to wet surfaces; otherwise, you will have to wait after the cleaning phase for the wood to dry sufficiently before the staining and sealing can happen.

Choose a stain or sealer to protect your newly cleaned deck.Ron Hazelton/youtube.com
Step 3: Seal the deal
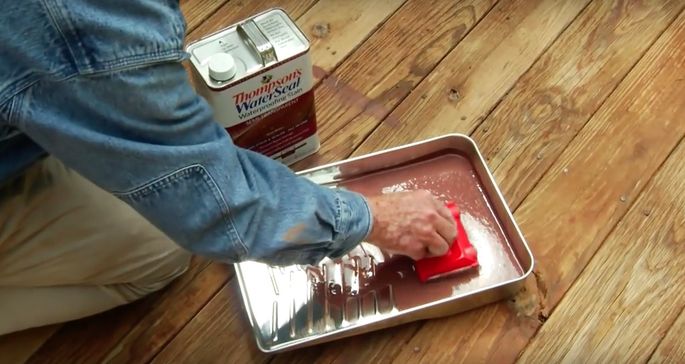
Using a deck staining pad with a handle or a long roller (so you can stand up while coating the boards), cover the rest of the deck with the stain and/or sealer. Always move the pad or roller in the direction of the wood grain for a smoother finish. A smaller pad/roller may be used for the rails on the deck. On vertical surfaces, apply from the bottom to the top to avoid drips and runs.

Use a smaller pad to apply stain or sealer to railings and balusters.Ron Hazelton/youtube.com
Step 4: Let it dry completely
Before putting any outdoor furniture or plants back on the deck, make sure that the stain or sealer has dried completely. You want to make sure that you don’t leave scuff marks on your newly treated deck, which is especially an issue if you’ve used a stain that is a different color than the wood’s natural hue.
See original article at: https://www.realtor.com/advice/home-improvement/how-to-stain-a-deck/


